
Did you know that the heat gun in the hands of a professional repair technician is actually a hidden home improvement wonder tool? This seemingly professional tool, with its precise temperature control and strong wind output, can easily achieve creative transformations that are difficult to accomplish with traditional tools. From renovating old items to customizing personal styles, from fine repairs to creative shaping, the heat gun can show its mettle.
In this article, we will unveil 10 stunning home renovation ideas for you, making your heat gun stand out from your toolbox and transform into a capable assistant for home DIY. Whether it's revitalizing old furniture or creating unique home decorations, these practical and creative ideas will help you achieve the most professional results at the lowest cost. Are you ready to embark on your home renovation journey? Let's explore the endless possibilities of the heat gun together!
Renovation of old furniture
"Furniture Renovation with a Heat Gun: An Eco-Friendly and Efficient Renovation Secret"
Want to give old furniture a new lease on life? A heat gun is definitely your best choice! This physical paint removal method is not only efficient, but more importantly, it completely avoids the pungent odor and environmental pollution caused by chemical paint removers.
During operation, please adjust the heat gun to a medium-high temperature setting of 300-400℃, maintain a safe distance of 10-15 cm, and heat the paint surface evenly in a circular motion. When you see the paint layer starting to blister or warp, immediately use a scraper to gently remove it along the grain direction. This thermal softening method is particularly suitable for treating vintage furniture with multiple layers of paint, as it can fully preserve the natural texture and feel of the wood.
Compared to traditional methods, hot air gun paint removal has three major advantages:
1. No damage to wood: Precise temperature control to avoid charring of wood
2. Thorough cleaning: Even stubborn paint stains in the gaps can be removed
3. Simple follow-up processing: apply wax or paint directly after sanding
After removing the paint, it is recommended to first use 180-grit sandpaper for overall sanding, followed by fine-tuning with 400-grit sandpaper. Finally, apply wood wax oil or environmentally friendly paint, and a completely transformed piece of furniture is ready! The entire process requires no professional skills, yet can achieve an effect comparable to professional refurbishment.
Customized heat shrinkable tube label
[Heat Shrink Tube Label DIY: Creating Cable Identifications That Never Fall Off]
Are you still fretting over messy wires? Using a heat gun and heat-shrink tubing, you can create professional-grade permanent cable labels! This method is more durable than traditional sticker labels and more aesthetically pleasing than plastic cable ties.
The preparation steps are super simple:
1. Purchase colored heat-shrink tubing (from electronic markets or online shopping)
2. Cut into 2-3cm small sections
3. Wrap it around the cable that needs to be marked
4. Heat uniformly with a hot air gun at 200℃
Three unique advantages:
✓ Never falls off: fits tightly to the cable after heat shrinking
✓ Waterproof and oil-resistant: suitable for use in various environments
✓ Personalization: Different colors for functional differentiation
Especially suitable for:
- Cable organization behind computers/TVs
- Tool power cord marking
- Wiring for smart home devices
Tips: When heating, constantly rotate the cable to ensure even heating; you can first write on the heat-shrink tubing with an oil pen, and the writing will remain permanent after heating. A label costing less than 1 yuan can solve the problem of cable clutter for many years!
Creative acrylic modeling
"Acrylic Creative Transformation: Embrace Personalized Home Décor with a Heat Gun"
Want to transform a plain acrylic board into a work of art? A hot air gun is your magic wand! Acrylic material softens perfectly at 120-150℃, making it a favorite among DIY enthusiasts.
Production steps:
1. Prepare an acrylic board with a thickness of 3-5mm
2. Adjust the heat gun to around 130℃
3. Heat the target area slowly and evenly
4. Shaping while hot (with the aid of a mold)
5. Natural cooling and setting
Creative application:
• Wavy bookshelf partition
• Curved LED lampshade
• Personalized photo frame
• Creative pen holder
Professional tips:
- Keep a distance of 10cm when heating
- Use wooden molds to assist in shaping
- The edges can be heated and polished until they become transparent
- Can be stacked in multiple layers to create three-dimensional shapes
This transformation is not only cost-effective (a piece of acrylic board costs about 20 yuan), but also allows you to create unique home decor that is not available on the market. Unleash your design inspiration with a hot air gun!
Wood product restoration
[Woodwork Restoration Secrets: The Magic Restoration Technique of the Heat Gun]
Are you still distressed about the dents and cracks in your beloved wooden furniture? A heat gun can give them a new lease on life! This physical restoration method won't damage the wood and yields results comparable to professional restoration.
Operation guide:
1. Dent repair:
- Cover with a wet towel (key step!)
- Heat with hot air circulation at 200℃ for 3 minutes
- Wood fibers expand and recover when wet
- Finally, polish and buff it
2. Crack repair:
- Heat the crack to a slightly warm temperature (about 60℃)
- Inject special wood glue
- Fix with pressure using a clamp for 24 hours
- The effect is 3 times stronger than cold bonding
Four major advantages:
✓ Does not alter the natural color of the wood
✓ The strength remains the same after repair
✓ Avoid chemical agent damage
✓ Suitable for valuable antique furniture
Professional advice:
• Avoid touching water within 24 hours after repair
• For better maintenance effect, use it together with wood wax oil
• It is recommended to treat large-area injuries in stages
A heat gun + basic carpentry skills = saving expensive repair costs! It is especially suitable for repairing common damaged parts such as solid wood dining table legs and chair seat surfaces.
Personalized leather hot stamping
[Leather hot stamping art: Creating exclusive marks with a heat gun]
Want to transform ordinary leather goods into high-end custom-made items? Hot air gun stamping technology allows your leather products to have a unique personal touch! This method is easier to control than traditional soldering irons, making it accessible even for beginners.
Professional operation guide:
1. Select the medium temperature setting of 150℃
2. Preheat the metal mold for 10 seconds
3. After positioning on the leather, apply even heat
4. Maintain moderate pressure for 3-5 seconds
5. After cooling, it presents a three-dimensional embossing
Five unique advantages:
✓ Uniform temperature without scorched edges
✓ Adjustable depth and pattern
✓ Supports complex patterns
✓ Permanent and non-fading
✓ High edge clarity
Innovative application scenarios:
• Customized initials wallet
• Notebook with hot stamped logo
• Personalized belt buckle decoration
• Exclusive mark for handmade leather bags
Professional tip:
- First, try printing on scrap leather material
- Using a brass mold yields the best results
- The leather should be kept dry before hot stamping
- Applying maintenance oil after completion will enhance the texture
A set of basic tools costs less than 100 yuan, yet it can make your leather goods achieve a luxury-level customization effect!
Ceramic tile seam beauty repair
"Ceramic Tile Seam Renovation Technique: Hot Air Gun Makes Old Seams Look Brand New"
Tired of blackened and peeling grout? A heat gun can give your tile grooves a new lease on life! This physical cleaning method is more thorough than chemical agents and is especially suitable for wet areas such as kitchens and bathrooms.
Professional refurbishment steps:
1. Soften old sealant with hot air at 200℃
2. Use a tile grout knife to thoroughly remove any residue
3. Clean the gaps with alcohol wipes
4. Inject new beauty sealant
5. Accelerated curing with hot air at 80℃
Four prominent advantages:
✓ Thoroughly remove moldy sealant
✓ No damage to tile glaze
✓ The adhesion of the new joint filler is improved by 50%
✓ The curing time is shortened to 2 hours
Applicable scenarios:
• Renovation of bathroom tile grout
• Mold-proof and beautiful seam in kitchen
• Maintenance of balcony floor tiles
• Mosaic tile restoration
Professional advice:
- Choosing epoxy colored sand is more durable
Using a hot air gun in conjunction with a vacuum cleaner is more efficient
- Maintain ventilation during construction
- Avoid touching water for 24 hours
A heat gun + materials costing a hundred yuan = giving old tiles a new lease on life! It's especially suitable for bathroom renovations in houses over 10 years old, and the results are comparable to those achieved by professional construction.
Creative candle making
"Old Wax Rebirth Technique: A Complete DIY Guide to Hot Air Gun Candles"
Don't throw away those unused candle stubs! With a heat gun, you can transform them into exquisite new candles. This method is three times faster than the traditional water bath heating method, and you don't have to worry about water vapor entering the candle wax at all.
Production steps:
1. Collect discarded candle blocks (different colors can be separated)
2. Place it into a heat-resistant glass container
3. Slowly melt with hot air at 150℃ (about 5 minutes)
4. Add aromatherapy essential oil (optional)
5. Pour into silicone mold for shaping
Five major innovative advantages:
✓ Melting speed increased by 300%
✓ Precise temperature control without damaging essential oil components
✓ Capable of making gradient color candles
✓ Completely avoid the safety hazards of the water bath method
✓ The wax solution is purer and bubble-free
Creative upgrade:
• Embedding dried flowers to make artistic candles
• Add coffee beans to create a masculine fragrance
• Use a mug as a container for a candle
• Making rainbow candles with layered injection
Safety tips:
- Wear heat-resistant gloves throughout the entire process
- Keep the work surface clean and tidy
- Children must operate under adult supervision
- The temperature of the wax solution should not exceed 80℃
On a weekend afternoon, you can create a scented candle comparable to those sold in department stores using scrap materials, with almost zero cost!
Plastic welding repair
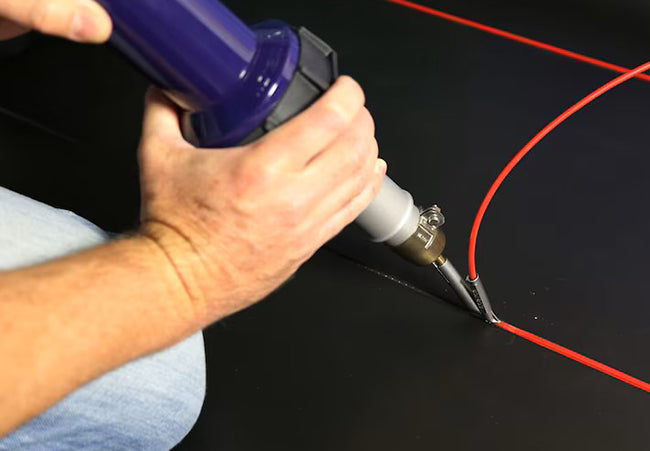
"Plastic Repair Black Technology: A Complete Guide to Hot Air Gun Welding"
Are you still fretting over broken plastic products? Hot air gun welding technology can give damaged plastic parts a new lease on life! This professional repair method can achieve a strength of up to 90% of the original product, yet the cost is less than one-tenth of the cost of replacement.
Professional repair steps:
1. Confirm the plastic material (commonly PP/ABS/PC)
2. Select the appropriate plastic welding rod
3. Adjust the heat gun to around 270℃
4. Heat both the fracture surface and the welding rod simultaneously
5. Rapid bonding and pressing in the molten state
Scope of application for repair:
✓ Broken children's toys
✓ Damaged shell of household appliance
✓ Cracks in plastic automotive parts
✓ Garden tool handle
Five major technological advantages:
• The welding strength far exceeds that of glue
• Leaves almost no trace of repair
• Can repair various plastic materials
• Easy to operate and get started
• The repair cost is extremely low
Professional advice:
- Maintain a welding distance of 2-3cm
- It is more precise when used with a dedicated plastic welding torch head
- Reach maximum strength within 24 hours after repair
- Can be polished and polished to perfection
Special reminder: Before repairing, be sure to clean the damaged surface to avoid oil stains affecting the welding effect. A heat gun + a few yuan worth of welding rods = saving plastic products worth hundreds of yuan!
Remove adhesive and stains from walls
"Wall Cleaning Revolution: Secrets to Removing Adhesive with a Heat Gun Without Damaging the Wall"
Are you still struggling with stubborn adhesive stains on your walls? The hot air gun adhesive removal method allows you to easily get rid of all kinds of adhesive residue, without worrying about damaging the wall surface or leaving a pungent odor from chemical adhesive removers!
Professional adhesive removal steps:
1. Adjust the heat gun to the low temperature setting of 100℃
2. Heat uniformly for 30 seconds at a distance of 10cm from the glue stain
3. Gently scrape off the softened glue
4. Use an eraser to clean up any remaining traces
5. Finally, wipe it clean with a dry cloth
Five prominent advantages:
✓ No damage to the wall paint layer
✓ Avoid chemical solvent contamination
✓ Especially suitable for children's rooms
✓ Easy to operate, no skills required
✓ Immediate effect
Applicable scenarios:
• Remove the residue of double-sided tape
• Remove adhesive residue from stickers
• Remove adhesive residue from hooks
• Dispose of label residue
Professional advice:
- The heating time should not exceed 1 minute
- Using a plastic spatula is safer
- Repeatable operation for stubborn stains
- Ventilate for 10 minutes after treatment
Special Note: This method is also applicable to removing glue stains on wooden doors and tiles. It's a multi-purpose machine and a great value for money! Compared to glue removers that often cost tens of yuan, a heat gun is both economical and environmentally friendly.
Customized thermoforming storage box
[Space Magician: Hot Air Gun Modified Exclusive Storage System]
Tired of the mundane storage boxes? With a heat gun, you can transform ordinary plastic containers into customized storage solutions that perfectly fit your space! This method is especially suitable for solving storage challenges in hard-to-reach corners, making the most of every inch of space.
Detailed explanation of the transformation steps:
1. Choose a plastic box made of PP or PE material
2. Mark the parts that need to be shaped
3. Heat locally with hot air at 150℃ until softened
4. Take advantage of the heat to set the shape on the external mold (existing items can be used as molds)
5. Quickly cool with cold water to fix the shape
Five major transformation advantages:
✓ 100% fit for special spaces
✓ Cost less than 1/10 of custom storage
✓ Can be adjusted twice at any time
✓ The intensity remains undiminished
✓ Supports multi-layer combination design
Innovative application scenarios:
• Odd and small corner storage system
• Customized drawer compartments
• Tool wall-mounted storage
• Cosmetic rotating shelf
• Multi-layer classification box for stationery
Professional advice:
- Monitor temperature using an infrared thermometer
- Thick-walled containers require extended heating time
- Lined with sandpaper to prevent mold adhesion
- The edge can be heated to melt, ensuring safer light emission
Special tip: After modification, the storage box can be sprayed with paint of the same color series, instantly enhancing the overall texture. In just one afternoon, you can create a complete set of personalized storage system, boosting storage efficiency by 300%!
[My experience on safe use of heat gun]
As a seasoned user of heat guns, I'd like to share a few life-saving safety tips. The first time I used one, I got a blister from not wearing gloves, and this lesson made me pay extra attention to safety precautions. Now, every time I operate one, I:
1. Fully equipped: Wear heat-resistant gloves and goggles (I was once splashed by rebounding hot plastic, but thankfully I had goggles)
2. Environmental inspection: Ensure that there are no flammable items such as curtains or paper within a 2-meter radius
3. Specialized stand: The metal stand I bought for 50 yuan is 10 times safer than just placing it on the table
4. Child protection: Lock the heat gun as you would a knife
Over the years, my heat gun has saved me at least tens of thousands of yuan in repair and modification costs. However, I must remind you not to be tempted by cheap, non-branded products! I recommend choosing:
- Equipped with automatic overheat protection
- Temperature control is precise to within ±5℃
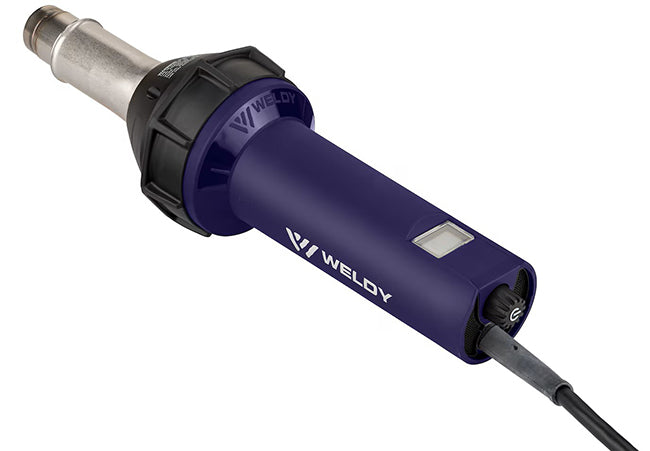
- With an LCD display
- Moderate weight (too heavy operation is tiring)
Remember, the money saved on safety is far more valuable than the tool itself! Although the one I'm using now is more expensive, it has been three years with zero accidents, making this investment well worth it.


Leave a comment
This site is protected by hCaptcha and the hCaptcha Privacy Policy and Terms of Service apply.